Carrot Sweet Potato Soup with Ginger & Coconut

Image

Am I overdoing it on the soups?  Is that possible?

This soup is both aesthetically and gastronomically pleasing… looking as beautiful in the bowl as it tastes in your mouth!  An undercurrent of rich coconut adds depth to the delicious combination of carrot, sweet potato, and ginger.

After making a huge pot of veggie broth yesterday, I realized that my freezer is a little too full to accommodate a bunch of cup-sized frozen broth cubes.  As I was mulling over the broth-y possibilities, R. pulled out the giant bags of carrots and sweet potatoes we bought on a rare trip to Costco, and pointed out the half-bar of creamed coconut that’s been waiting forlornly for a purpose for an indefinite period of time.  He asked if I could make these things into a soup.  Yes, yes I could.

(Note: I wanted a very subtle coconut flavour to complement the ginger, so I used only a quarter-bar of creamed coconut.  If you really like coconut though, I think you could add up to half a bar for a stronger coconut flavour.)

Yield: Lots…. probably a good 8 servings.  (Or, dinner + seconds + leftovers to freeze!)

  • 5 very large carrots, peeled and cut into large chunks
  • Olive oil
  • 2 yellow onions, finely chopped
  • Cooking oil (I use canola)
  • 2 ribs celery, chopped
  • 2 inches of ginger, minced
  • 2 smallish sweet potatoes, peeled and diced
  • 4 cups vegetable broth (more or less)
  • ¼ bar of creamed coconut (the full bar is 170g), roughly chopped
  • ¾ cup milk of choice (I used soy)
  • Fresh ground black pepper

Heat the oven to 400.  Toss the carrots in olive oil and spread onto a baking sheet, then roast until softened through, about 30 minutes.

Meanwhile, heat some cooking oil over medium in a large stockpot.  Add the onion, celery, and ginger and cook, stirring occasionally, for about 10 minutes until softened.  Add about 3 cups of broth and the diced potatoes and turn heat to high.  Bring to a boil, then reduce heat and simmer until potatoes are soft.  At some point during the simmer, the carrots will probably be done and can be added to the soup.

Once the potatoes are very soft, turn off the heat.  Stir in the milk and the creamed coconut and let the soup cool until it’s no longer hot enough to burn you if it splatters during pureeing.

Add fresh ground black pepper.  Using an immersion blender (or a food processor, but you’ll have to do it in batches), puree the soup.  Add more broth to reach your preferred consistency.  I tasted the soup before adding salt and discovered it was perfect, so I didn’t end up adding any at all!

Garnish with a drizzle of olive oil to serve.

Diablo 3 Review

I completed Diablo 3 (PS3) on Normal – Master I, as the wizard, with the Templar.  After initially playing on Normal, which was mind-numbingly easy, I restarted on Master I.  This was a good difficulty level for me, a moderately experienced player of action RPGs, in terms of enemy health and offensive power, and the dungeon-crawling was fun.  However, many other elements of the game design conspired to provide a game experience with virtually no sense of risk or danger, and therefore devoid of real excitement.

First and foremost, there are virtually no consequences for dying outside of boss battles.  Oh, my equipment suffered a 10% durability loss?  I’ll just instantly teleport back to town and fix it for mere pennies.  Phew, crisis avoided.  Seriously though, it’s as if the game developers thought that making you occasionally have to spend 45 seconds going to get your stuff fixed would provide enough of a death-deterrent to give the game some tension.  Umm…. no.  At least you have to complete boss battles in one life, providing the game with a bare minimum of challenging moments.

(I actually liked the boss battles for the most part, which is rare for me; I generally have a bit of a hate on for bosses in games.  But maybe I just liked them because they were the only exciting parts.)

Similarly, the socketing aspect of gear customization felt hollow.  The fact that you can install and remove gems as many times as you like means that you can just throw any old gem into any old weapon or piece of armour, see how it goes, take it out, stick it in something else, and so on, and so forth.  There is no commitment.  I would have liked to see a system that involves permanent gem installation, meaning that you’d have to put some real thought into gear planning.

The teleport-back-to-town option is unlimited and can be used anytime, anywhere (except, I’m assuming, in boss battles… I don’t think I ever tried it).  I remember in Champions of Norath, having to hoard precious gate scrolls to use sparingly for trips back home to the merchants.  Once again, Diablo 3 makes it all too easy by letting you zip around the world at a moment’s notice and as often as you please.

Mind you, it’s not like you’re going to town to buy anything from merchants (except maybe the odd health potion); they never seem to carry gear that’s comparable, let alone superior to what’s getting dropped in the field.  I appreciate games that stock merchants with really badass and expensive gear, so that you end up saving your cash to buy that one amazing piece of equipment.  It gives you something to work toward. This is not the case in Diablo 3.

While the full-motion cutscenes between acts were fantastic, the in-game dialogue was pretty boring.  As I mentioned in a previous article, I need to see characters’ faces while they’re talking, at least part of the time, to really feel engaged.  An ellipsis appearing in a speech bubble over a character’s head to show who’s talking is not what I consider enthralling storytelling.  The only really excellent moment of voice acting was by a woman trapped in the web of a giant spider (huge spiders… a real trope of dungeon crawlers).  Her brief scene of absolute terror stood out amidst the game’s mostly ignorable dialogue.  I also liked the female monk’s pseudo-Russian accent.

I had originally planned to play this game on couch co-op with R., but we quickly discovered that Diablo 3 has a serious flaw in this game mode: only one player at a time can access their menu.  For a game so heavy on looting and inventory/skill management, this was a deal-breaker.  We opted to play individually rather than spend copious amounts of time either waiting for the other player to use their menu or feeling rushed when using our own.

Although I obviously have a lot of complaints, the game wasn’t all bad.  Having played both the monk and wizard and having watched R. play the witch doctor, I got a good sense of the variety of character classes.  I appreciated the differences between the classes and the wide range of skills: the wizard with her wide variety of offensive, defensive, and support spells allowing for a high level of player choice in fighting style; the monk fighting fast and hard up close, zipping around the screen to instantly close distances between monsters; the witch doctor rolling around with a huge posse of zombie dogs, spiders, gargantuans, fetishes (tiny creatures with absurdly large knives), bats, and other creatures to do his bidding.

While it was a strange decision on the part of the developers to omit any player input into the skill development path (each level unlocks a few skills/skill-modifying runes, but these are predetermined), the lack of a customizable skill tree didn’t actually bother me very much.  I think this is because there was such a wide range of skills, and there were a few unlocked at each level; by choosing which skills and runes to equip, the player is able to customize the character’s abilities.

Ultimately, my overall feeling was that the game was designed to hold your hand in every area except maybe in direct battle with monsters.  I understand that higher difficulties like Nightmare and Inferno would provide very challenging battles, but the peripheral issues would still be problematic.  While I certainly enjoy the thrill of seeing that orange item heading indicating a legendary find, I’m not loot-driven enough to feel satisfied by this game.  For me, Diablo 3 missed the mark.

Favourite Recipes: Cheesy-Squashy Stuffed Pasta Shells

Stuffed Pasta Shells closeup

This recipe from Luminous Vegans is one of my favourites of all time.  These pasta shells are stuffed with a mixture of cashew cheese, roasted squash, and fresh herbs, and will completely blow your mind.  They are that good.  I’ve made them to rave reviews for a few different family members.  Everyone says they can’t believe there’s no “real” cheese in them.  They are so creamy and rich…. Seriously.  Make them.

I follow the recipe for the cashew cheese exactly, but I put about ¾ of the batch into the shell filing, rather than the ½ cup suggested.  I bet you could put it all in and it would be great too, I just like to keep a little bit to put on sandwiches so I hold some back.  I use jarred roasted garlic pasta sauce on top.

This recipe is a keeper!

The Haunted Nintendo: A True Story

Image

I got my first console, the Nintendo Entertainment System, when I was five years old.  My parents bought it for me for Christmas, and it came bundled with the classic Mario Brothers / Duck Hunt dual cartridge.  I’m not certain, but I don’t believe I had asked for an NES; I just had a forward-thinking mother who knew a good toy when she saw it.  What she didn’t know was that the NES was haunted*.

(As an aside, I really have to thank my mother for consistently buying new consoles and games for my sister and I throughout our childhoods and teenage years.  Without her support, I’m sure I never would have gotten so involved in gaming.)

My first few times playing Mario went smoothly; I quickly grasped the concept of using the controller to move the cartoon man on the screen, and probably spent a lot of time on level 1-1.  My growing fondness for the system was shattered, however, the first time that I turned on the NES and for whatever reason, didn’t start playing right away.  As the idle console began showing the recorded demo of Mario playing through the first level, I watched in confusion.  I knew that I controlled Mario with the gray rectangle-thingy.  So who was controlling him now?  How could he move without any button-pushing from me?  I must have asked my mother, and whatever response she provided did not fully put my mind at ease.  I looked with suspicion on the NES, but managed to put that first creepy experience behind me.

I played Mario at least a few more times before accidentally seeing the demo again.  The second time was the clincher.  I watched, transfixed and with growing terror, as the ghost in the machine gleefully hopped around level 1-1, my level, on my game.  How was this possible?  The only explanation I could fathom was some kind of supernatural one.  I don’t believe I worked out the exact details of the Nintendo ghost, but I didn’t need to.  Even after turning off the NES and the tv, I couldn’t look at the console without feeling the fear. The Nintendo had to go.

I explained, somehow, to my mother that I wanted her to get rid of the NES.  She didn’t understand exactly what the problem was, but offered to put the offending console away in the attic until I was ready to try it again.  That solution was NOT acceptable.  It needed to be OUT of the house.  She told me she would take care of it, but when I went up to the attic later that day, my suspicions were confirmed; it was indeed tucked away, in its box, in a dark corner.  I was enraged that my mother had lied to me, and after the ensuing tearful confrontation, she gave the NES away to a couple of friends with kids of their own.  Kids who were not afraid of the NES.

I’ve pieced this story together from a combination of my own recollections and my mother’s.  The strongest memory I have of this episode is an emotional one, a memory of the true and deep-seated unease, escalating to real fear of the NES.  It’s hard to understand, as an adult, how I could have actually been terrorized by a game demo, but that is what happened.

It was three years later, at age 8, that I apparently decided I was over my fear and wanted a new Nintendo.  My wonderful mother bought me one for my 9th birthday, this time bundled with Kirby’s Adventure (a favourite game to this day).  My relationship with the second NES console was excellent from the start, and bloomed into a lifelong love affair with games.

But part of me still wonders what exactly was going on with that first console.

Image

This photo was taken at my 9th birthday party. My guests are apparently not having a super fun time watching me try out Kirby’s Adventure. I’m pretty sure I eventually gave everyone a turn, but belated apologies for my terrible manners nonetheless.

*Not actually haunted.

Portobello Mushroom and Caramelized Onion Soup

Image

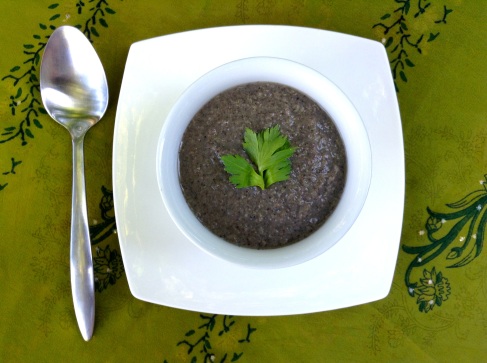
This thick, satisfying, autumn-flavoured soup tastes just like a bowl of juicy roasted Portobello mushrooms.  Actually, that’s exactly what it is.  How can you say no?

Years ago, after my undergrad, I had a part-time job in a psychology lab.  It wasn’t enough to pay the bills, so I decided to take a few shifts a week at a newly-opened takeout soup place in Halifax.  Suffice it to say, I only made it through two shifts.  During my brief time however, I tasted heaven in the form of a pureed Portobello mushroom soup.  The interesting thing was that back then, I hated mushrooms.  I don’t know how I even ended up trying it out, but that soup was so delicious that it stayed in my mind for years afterward.  I finally decided this week to try my hand at making a similar one.  Too much time has passed for me to say if this soup is really all that close to the one from years ago, but it’s so yummy that it doesn’t really matter.

Yield: A lot of soup… about 8 servings.

  • 10 large Portobello mushrooms, stems separated and caps cut into quarters
  • Olive oil
  • 3 yellow onions, diced
  • Canola oil (or other cooking oil)
  • 3 ribs celery, chopped
  • 5 cloves garlic, minced
  • 2 medium white potatoes, diced
  • 2 bay leaves
  • 3 cups vegetable broth
  • 2 cups milk of choice (I used unsweetened soy)
  • ½ cup red wine
  • Salt to taste

Heat the oven to 400.  Toss the cut mushrooms in a bit of olive oil, season with salt and pepper, and spread in a single layer onto two parchment-lined baking sheets.  Roast for about 30 minutes, until soft and juicy.  Remove when done and put aside.

While the mushrooms are roasting, heat a frying pan over low-medium heat (about 4), and add some canola oil and the onions.  The key to caramelizing them nicely is cooking them at this low-ish heat for a while, about 30-40 minutes.  Stir them every few minutes.

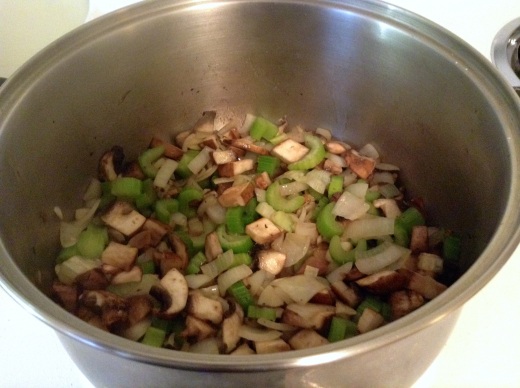
When the onions are very soft and have begun to turn golden, add the celery and garlic and continue cooking for another 5 minutes or so, until the onions look perfectly golden brown and gooey.  Add the broth, potatoes, and bay leaves and turn heat to high.  When the soup boils, reduce heat and simmer until potatoes are very soft.  Carefully remove bay leaves.

Now stir in the mushrooms, milk, red wine, and salt (about ¾ teaspoon, or to taste).  This should cool the soup down sufficiently to allow you to safely puree it, using an immersion blender on the stovetop.  (Be sure to check that it’s not hot before you puree though.)  If you don’t have an immersion blender, you’ll probably have to do it in a few batches in a food processor.

Puree to a nice smooth consistency, then adjust seasoning as desired.  Gently heat the soup back up on the stovetop at medium heat, and garnish with a drizzle of olive oil and some fresh parsley to serve.

Image

Tabouleh Lentil Salad

Image

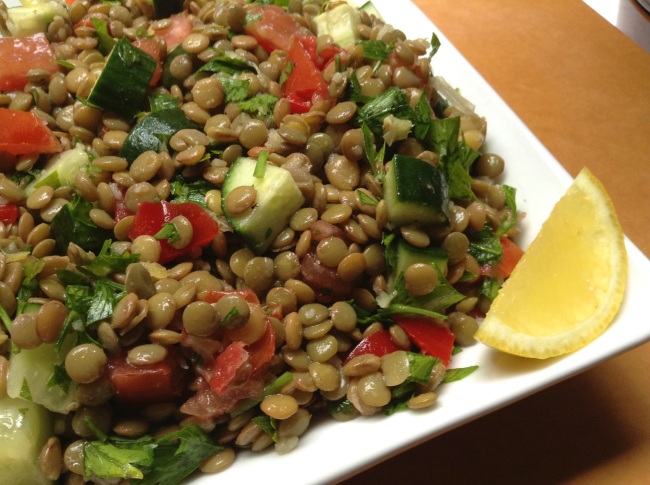
I love tabouleh.  I love lentils.  In this salad, they love each other.

This is more of an idea than a really specific recipe, per se.  I needed to make a quick lunch, threw this together, and it was fresh and filling at the same time (not to mention low-fat, high-protein)… perfect.

All of these measures are estimates, and I think that you could combine these ingredients in just about any proportions and the result would be delicious.

  • 1 cup green lentils, cooked and cooled (dry measure)
  • 2 small tomatoes, diced
  • 1/3 of a red pepper, finely chopped (to brighten the colour and add crunch)
  • 1/3 of an English cucumber, quartered lengthwise and sliced
  • 1 handful of fresh parsley, chopped
  • 2 garlic cloves (for a normal person) or ~6 garlic cloves (Garlic Fiend option), pressed through a garlic press or finely chopped
  • 1-2 tablespoons lemon juice
  • 1 tablespoon olive oil
  • Pinch of cumin
  • Salt and pepper

Mix it all together.  Eat it for all your meals and snacks until there is none left.

Image

Diablo 3, Take 2: Wizarding in Fart Pants

Image

I decided to start over.  As noted in this previous post, I was finding Diablo 3 on “Normal” way too easy and therefore not fun, so after starting Act III, I decided to suck it up and restart the game on a higher difficulty.  After hearing from my sister that “Difficult” was still easy enough to button-mash your way through, I opted for “Master 1.”  And while I loved the Monk and would have liked to see her reach her full potential, I chose the Wizard for this playthrough, after reading that it’s one of the more challenging character classes.

I almost regretted my decision during my first few hours of play, as the game was way hard (and I knew how foolish I’d feel if I went from too easy to too hard by jumping two difficulty levels).  I actually had to grind out a couple of levels in order to beat the Skeleton King.  However, the game is definitely more interesting this way.  It actually matters which follower I choose (I’m sticking with the Templar for now), and I sometimes have to use the blacksmith in order to make stronger weapons and armor than what is getting dropped.

Speaking of dropped armor, toward the end of Act I a monster dropped a pair of legendary pants, the Pox Faulds.  In addition to a high armor rating, they provide boosts to intelligence and vitality, which makes them perfect for my wizard.  Intriguingly, the item description had an extra note that “These pants sometimes make you stink,” presumably because they are “made from the treated of skin of plague victims.”  I like when games include weird little humorous elements like this, so I was extra-pleased with the pants.

What I didn’t expect was that after wearing them for a few seconds, my character would emit a greenish cloud, and a buff labeled “Stinky” would appear over the HUD.  It disappeared after a few seconds, but returned with a puff of smoke/gas in regular intervals.  The best part?  The stinky cloud damages enemies who pass through it.  It’s pretty ridiculous, but I like it.  It’s nice when games don’t take themselves too seriously.

For now, I’ll keep working on my new playthrough with an additional skill of sorts… fart attack!

Hearty Traditional-Style Stew with Jackfruit

Image

This traditional-style stew is extremely healthy, low in fat, packed with good stuff and will comfort and warm you like a big, soft blanket.  Wine-soaked jackfruit replaces the traditional beef and big chucks of root vegetables are perfectly softened by the thick, delicious gravy.  A perfect dish to warm up on a fall evening.

Jackfruit are huge, spiky, intimidating things, and until recently my experience with them was limited to some jackfruit juice years ago and more recently, ogling the whole fruits at the produce stands in Chinatown.  However, since being floored by the jackfruit tacos at Hot Beans in Toronto, the mysterious fruit has really been on my mind.  If I hadn’t been in an all-vegan establishment, I would have honestly though I had been served meat tacos.  The texture was fascinating.  I knew right away after that taco experience that I needed to incorporate jackfruit into my own cooking.

A bit of reading online revealed that in south Asian countries, jackfruit is sometimes called “vegetable meat” and is commonly used in vegetarian cuisine.  I also learned that if you’re planning to use jackfruit in savory cooking, it’s very important to learn the difference between the two types of canned fruit available.  The ripe, sweet fruit packed in syrup is not suitable for this purpose; you need to get young, green, unripe jackfruit packed in brine.  At my local No Frills, they only had the sweet stuff.  I found the young-in-brine fruit at an Asian grocery and bought a few cans to experiment with.

ImageI’ve been meaning to make a traditional-style stew (“like Mom used to make”) for a while, and had been planning to use seitan in it.  I’m not always the biggest fan of seitan, so it was taking me a while to get around to making the stew.  Then, lightbulb!  I’ll use the jackfruit!  After some consultation with my mom, I came up with this stew and it was perfect; so much like the stew I ate as an omnivorous child.

Yield: a really big pot of stew.

  • For the jackfruit:
  • 2 cans *young jackfruit in brine* (see note above)
  • 1.5 cups red wine
  • ~1/2 cup flour (maybe more)
  • salt and pepper
  • cooking oil appropriate for medium-high heat (i.e. not olive oil; I use canola)
  • For the base:
  • 2 yellow onions, finely chopped
  • 4 stalks celery, chopped
  • 3 smallish or 2 large portobello mushrooms, chopped to same size as celery
  • 6-10 cloves garlic, chopped
  • 1 can stewed tomatoes
  • 2-3 cups vegetable stock
  • 2 tablespoons molasses
  • 1 tablespoon Tabasco sauce (or more, as you like)
  • 2 bay leaves
  • 1 tablespoon rosemary
  • Root veggies:
  • 4 red potatoes
  • 2 large parsnips
  • 1 turnip
  • 4 carrots
  • *All root veggies peeled and cut into large pieces.  You can use any stew-y veggies that you like.  I used about six cups total.*

Drain the jackfruit and press the pieces between the backs of two plates to squeeze as much liquid out as possible.  If you like, you can trim some of the core (the more dense/solid part) off the chunks (this part doesn’t end up with as meaty a texture, but I didn’t mind and used the whole pieces).  Place the fruit in a shallow dish and cover with the red wine.  Marinate for 30 minutes to an hour.  Drain and reserve ½ cup of red wine.

ImageHeat a large heavy stockpot to med-high heat and add a good amount of oil.  Season the fruit with salt and pepper and dredge in flour.  Using tongs, carefully add the jackfruit to the pot and sear for about 2 minutes, watching closely to avoid burning, then flip and give another minute or two on the second side.  You may need to add more oil as you go along.  Remove the fruit, turn the heat down to medium, and add more oil if needed to prepare the stew base.

ImageAdd the onion, celery, mushrooms and garlic to the pot over medium heat.  Cook until soft, about 10 minutes, stirring every couple of minutes.  Add all remaining base ingredients (I suggest starting will 2 cups of broth and adding more as needed while the stew cooks), plus the reserved wine, and stir well.  Add the root vegetables and the jackfruit.  Bring to a boil and then reduce to a simmer.  Let the stew cook uncovered to reduce for about 45 minutes before the next step.  Use a rubber spatula to stir and scrape the bottom of the pot occasionally to make sure things don’t get stuck.

ImageOnce everything has been cooking for a while, it’s time to pull the jackfruit back out of the stew (I know, it’s messy, but the end result is worth it).  Dig around in the stew and use tongs to remove all the big jackfruit pieces and place them on a large cutting board.  Mash the fruit with a fork.  If you kept the core bits in, you’ll need to push down harder to mash them.  (See photo for how it should look at this point).   Some seeds with probably pop out at this point (they look exactly like garlic cloves!).  Just give them a quick mash; no need to remove them.  Return the jackfruit to the stew (don’t worry, you won’t need to take it out again).

ImageSimmer the stew for another hour at least, until the big root vegetables are soft.  You may need to add more broth, depending on how much the liquid reduced previously.

That’s it!  The reward for your hard work is a giant pot of delicious, warming stew that will taste even better the next day.  I imagine you could freeze some, but it’s so delicious that R and I ate the whole pot within a couple of days, so I can’t attest to its freezability.  Serve with warm crusty bread.

Image

Image