Corn and Zucchini Fritters

Fritters close 2

I had a fridge full of ears of corn and wanted to try something different with them. The word FRITTER just kind of appeared in my mind, which is weird because I had literally never made any kind of fritter before. I did a bit of reading online to get a sense of what to do (though I was really surprised at the variation in recipes; some with flour, some without, some with liquid, some without….). Then I just kind of went for it and was so pleasantly surprised at how well these turned out. I whipped up a quick avocado dipping cream to go with them. I think these delicious and very easy fritters will become a regular menu item!

I’m sure these would lend themselves to lots of variations, especially with different fresh herbs or seasonings. I used chickpea flour mainly because I’ve been wanting to try working with it, but I think almost any flour would work pretty well (Note: depending on which flour you use, they might not be gluten-free anymore).

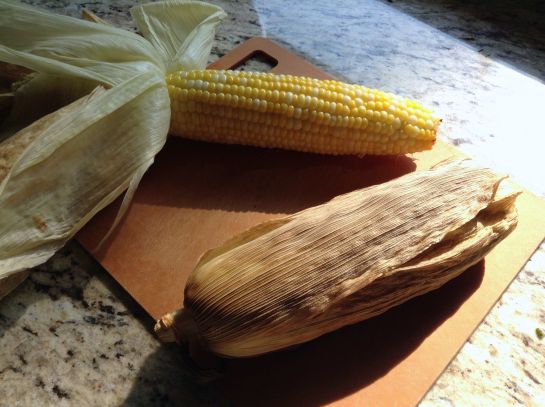
roasted corn

To roast corn on the cob, remove the outer husks so that a few leaves remain covering the corn and cook in oven at 400 degrees for about 40 minutes or until done.

Yield: about 10 fritters

  • Kernels removed from two cobs of roasted corn (see above), or use 1.5 cups canned or frozen
  • 1 medium zucchini, grated
  • 1 handful chives, chopped
  • 1 cup chickpea flour (would probably work with other flours too!)
  • ½ cup water
  • Tabasco to taste
  • Salt and pepper to taste
  • Coconut oil for frying

Add corn, grated zucchini, chives, and flour to a mixing bowl and combine well. Add a few dashes (or more!) of Tabasco, then start adding the water gradually while stirring the mixture. You may need a little more or less than half a cup; just aim for everything to be moistened into a batter that will at least sort of stick together when you scoop some up with a spoon.

Fritter batter

Heat about a teaspoon of coconut oil over medium heat (about 6) in a nonstick frying pan. Drop large spoonfuls of the corn mixture into the pan, using the back of the spoon or a spatula to flatten them out a bit. Cook until golden on one side, about 4 minutes, then flip and continue to fry until cooked through. Add another teaspoon of coconut oil to the pan for each new batch. Place finished fritters on a paper towel until ready to serve.

Fritters cooking

Serve with the avocado cream or with hot sauce, chutney, or vegan sour cream.

For the avocado cream:

  • 1 avocado
  • Juice of one lime
  • ¼ cup of nondairy milk (just enough milk to get it all to purée to your desired consistency).
  • Salt and pepper to taste
  • Small handful of chopped cilantro

Add all ingredients except chopped cilantro to a high-speed blender. Blend, then fold in chopped cilantro.

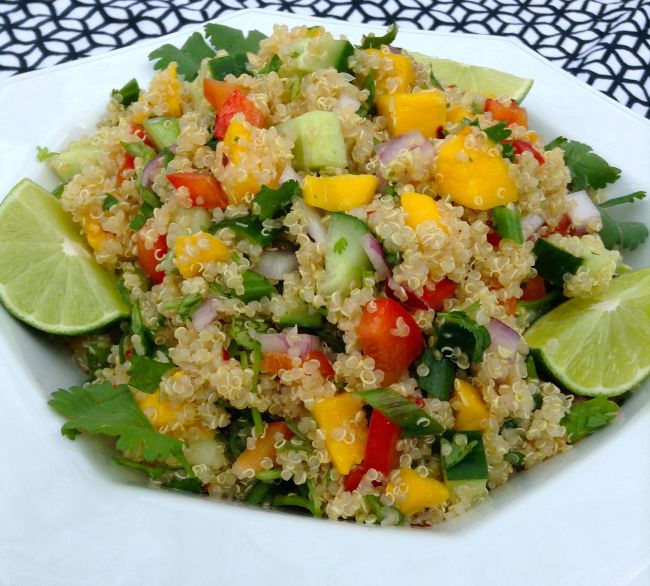
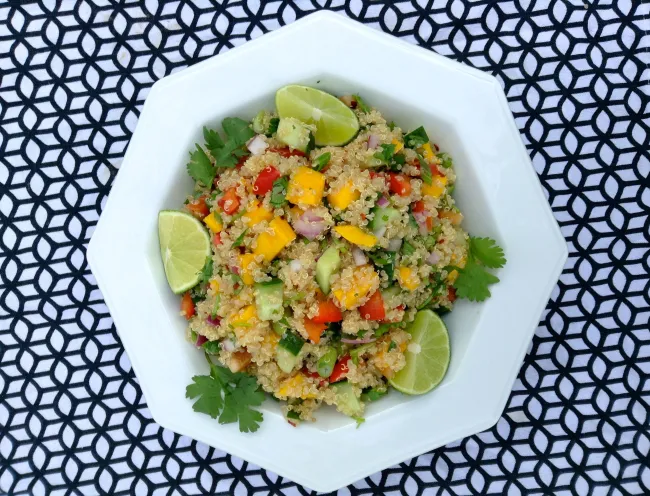
Mango Quinoa Salad

Image

This fresh salad gives you that yummy Thai mango salad flavour with more substance and protein, and less chopping. It’s win-win!

Makes about 5 cups of salad

*When prepping the mangos and veggies, try to make all your pieces around the same size (except the red onion, which should be smaller).*

  • 1 cup quinoa (dry measure), cooked and cooled
  • 2 small-medium mangos (see note), flesh removed from pit and diced
  • ½ English cucumber, diced
  • 1 small red pepper, diced
  • 3 green onions, green parts only, sliced
  • ½ small red onion, finely chopped
  • 1 handful fresh cilantro, leaves and stems, chopped.
  • Lime wedges and cilantro leaves, to garnish.

Dressing:

  • Juice of 1.5-2 limes (if you’re reaming the limes, one and a half should be enough)
  • ½ teaspoon brown or turbinado sugar
  • ½ teaspoon soy sauce or tamari
  • 3 tablespoons oil (I used safflower, but any oil that doesn’t have a strong flavour would work)
  • 1 teaspoon chili flakes (or more, if you like it spicy)

Note on the mangos: I used ataulfo mangos that were moderately ripe. If you like your mango salad with firm green (unripe) mango flesh, by all means use green mangos. Try to avoid fully ripe ones, as they are difficult to cut and lose their cube-y shape.

Whisk together the dressing ingredients and adjust to taste.

Combine the cooled quinoa with all other salad ingredients. Pour the dressing over and toss well to combine. Allow to sit for about 15 minutes, then toss again just before serving. Garnish with lime wedges and cilantro leaves.

Image

Favourite Recipes, Baked Goods Edition: Cornbread and Oatmeal Chocolate Chip Cookies

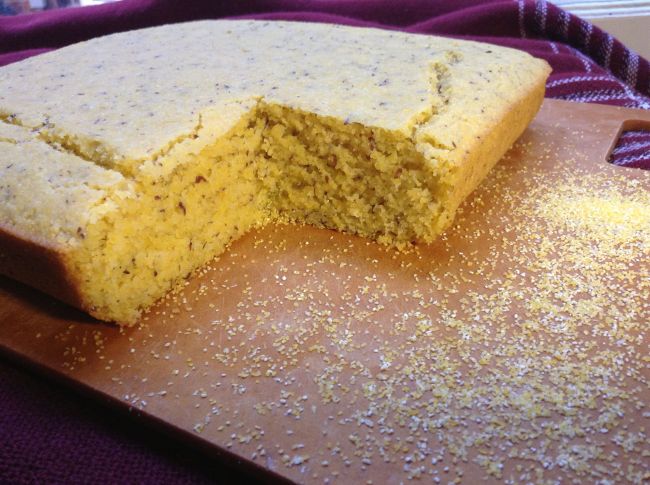
Deliciously and moist cornbread

When I was vegetarian but not vegan, I was very skeptical about vegan sweets and baked goods. I would visit Fresh restaurant in Toronto and devour everything on the lunch or dinner menu, but never even try the (vegan) desserts. Obviously, I was way wrong and ignorant. I know now that vegan sweets and baked goods are every bit as wonderful as the traditional ones, and even better for being made with compassion.

Here are two of my favourite baking recipes, for oatmeal chocolate chip cookies and cornbread. These aren’t my own recipes; I’m a baking beginner. Both of these recipes can be whipped up and in the oven in less than five minutes (seriously). Both are absolutely top-notch and ensure that you’ll never have to look for another oatmeal chocolate chip cookie or cornbread recipe.

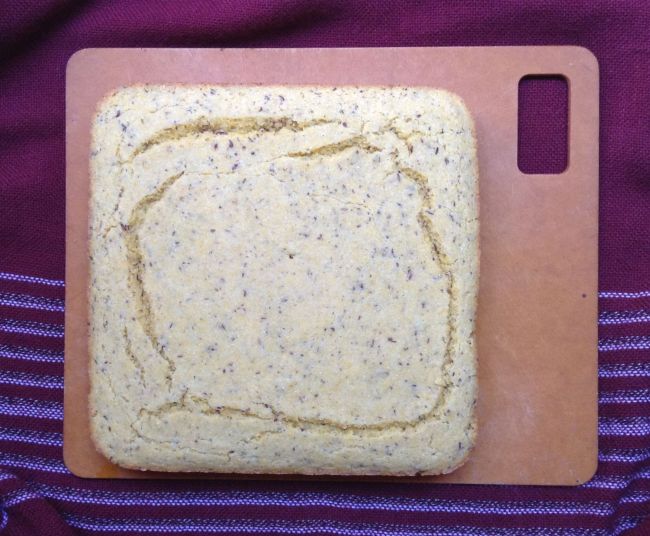
Cornbread

This recipe for cornbread from Pickles and Honey is perfect. Ridiculously easy and virtually foolproof, the cornbread is delicious either as directed, or with endless variations like added jalapenos, vegan cheddar, roasted corn, or whatever else you’d like to throw in. I follow the recipe exactly and don’t make any changes (except add-ins).  Served warm and smeared with some vegan butter or margarine it is so, so good.

Cornbread

Oatmeal Chocolate Chip Cookies

Growing up, oatmeal chocolate chip cookies were my favourite sweet by a large margin. After going vegan I tried several recipes with variable results. This recipe from Vegan Occasions blew my socks off when I tried it. R. loves them, my mom loves them, everyone loves them.

Recipe tweaks: I find that the cookies are just as good with 1 cup loosely packed sugar, rather than the 1.25 cups called for. You can also trade off a little bit of the oil for extra juice (apple or orange juice work equally well) if you like.  If you’re using mini vegan chocolate chips rather than the stadard size, I suggest reducing the amount to 3/4 of a cup.

Important: Don’t overcook these cookies! I find that they take about 10 minutes. Watch them like a hawk for the last couple of minutes and remove as soon as they start to turn the slightest bit golden. If they do end up getting a bit too much time in the oven, they will cool crispy rather than chewy. They’re still great, but I suggest a few seconds in the microwave to soften them up before serving if they’ve cooled hard.

Best cookies EVER

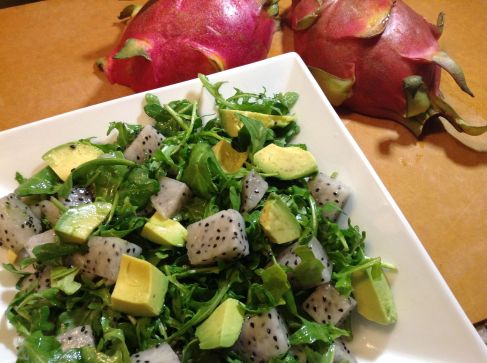
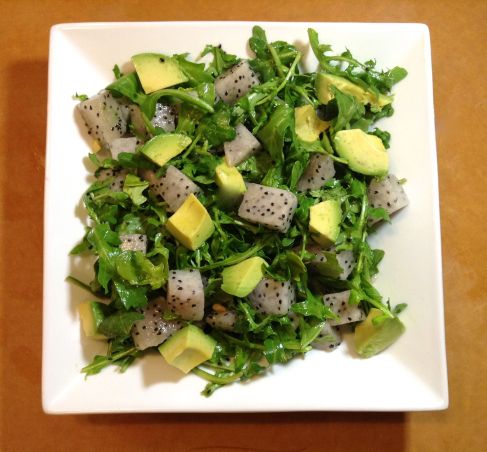
Dragon Fruit, Arugula, and Avocado Salad

Image

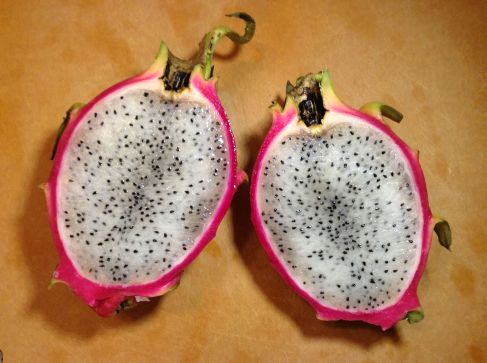
This salad is a delicious combination of tastes and textures: fresh and creamy, bright and peppery.  It’s super easy and quick to make, with just a few ingredients!  Plus, it looks impressive and is perfect for serving guests; dragonfruit has a mild taste (I find it similar to kiwi) and shouldn’t scare off those who haven’t tried it before.

Image

Yield: 2 large or 4 side servings

  • 1 large dragon fruit
  • 1 package baby arugula
  • 2 avocados, peeled and diced
  • Juice of 1 lemon (or more, if you prefer)
  • ¼ cup olive oil (or less, if you prefer)
  • 2 teaspoons agave nectar

To prepare the dragon fruit, first cut it in half lengthwise.  Using a large spoon, separate the flesh from the rind.  Cut the flesh into 1-inch cubes.

Combine the arugula, dragon fruit, and diced avocado.

Whisk together the lemon juice, olive oil and agave nectar.  Taste and adjust with more lemon juice if desired.  Pour the dressing over the salad, gently toss to coat, and serve immediately.  *If you aren’t ready to serve the salad, hold off on adding the dressing until just before serving.*  Enjoy!

Image

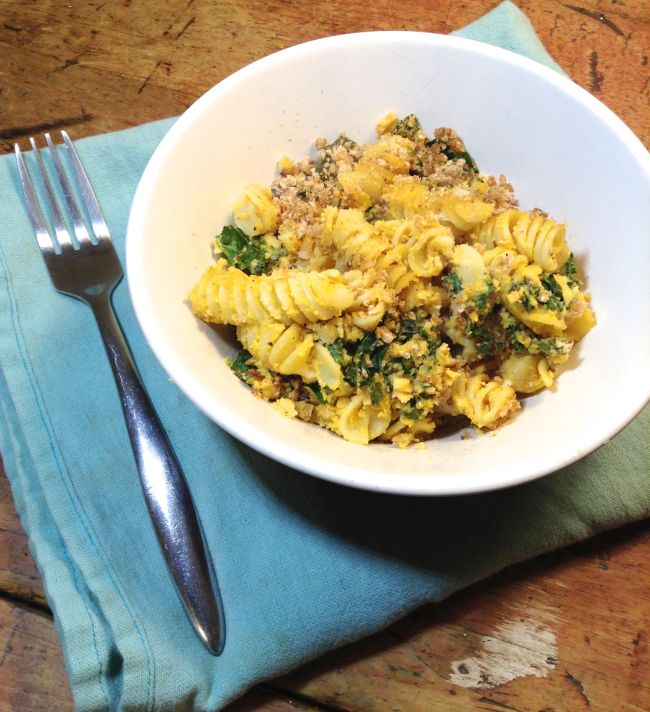
Favourite Recipes: Vegan Mac and Cheese

Image

This recipe from Fine Tune Pilates is touted as the best ever, and I have to agree.  I tried four or five different vegan mac and cheese recipes before finding this one, and it is by far the best I’ve had.  Plus it’s easy to make, and uses sweet potato as the sauce base, allowing you to sneak an extra veggie into this yummy pasta dish.  I make this dish regularly; R and I both love it.

I do make a couple of modifications from the original recipe.  First, I do not add whole sunflower seeds (though I do use them in the sauce).  Also, I use more kale than the recipe calls for; about twice as much.

More significantly, after preparing the recipe as written, I pour the whole thing into a casserole dish, top it with panko or breadcrumbs, top the crumbs with lots of tiny dots of vegan margarine, and bake it for about 25 minutes.  The crumbs add nice texture to the finished dish.  I like to eat it with ketchup (much to R’s chagrin), but it’s also great with just some fresh ground pepper, or even hot sauce.  Delicious!

Mushroom Risotto

Image

Before I had ever tried making risotto, I had an idea that it was very challenging and only for experienced cooks.  I don’t know where I got that idea, but it was wrong.  Making rich, flavourful risotto is actually very easy; all it takes is some patience and a willingness to babysit the pan for a while.  It’s a great dish to prepare while working on something on the counter, like making a big salad.  You stir the risotto, you chop some veggies, stir, chop, stir, chop, etc.

If you haven’t made risotto before, try this recipe.  It’s easy and so delicious, you’ll be hooked.  I can practically guarantee you’ll start making it (and trying variations) regularly.

Important:  You need to get Arborio rice in order to make risotto.  Don’t bother trying it with any other type of rice; it’ll end in heartache!

Yield: About 4-5 cups of risotto; 4-6 servings

  • 4 cups vegetable stock (you’ll end up using between 3 and 4 cups)
  • 5 large portobello mushrooms, chopped into 1 inch pieces
  • 1.5 cups finely chopped onion
  • 1 cup Arborio rice (it won’t work with other types of rice!)
  • ½ cup red wine (or you can use white)
  • 1 tablespoon vegan parmesan (optional)

Heat some oil in a large skillet over medium heat and add mushrooms.  While the mushrooms are cooking, put the vegetable stock in a pot over high heat.  Just before it boils, turn off the heat but leave the pot on the hot burner to keep the stock very warm.  Cook the mushrooms, stirring occasionally, until they are done: tender and juicy.  Remove from pan and set aside.

Add a bit more oil to the pan if necessary and then add the onions.  Stir and cook until they are translucent.  Reduce heat to just below medium and add the dry rice.  Brown the rice a bit, being sure to keep scraping the pan to prevent it from sticking.  Add the wine, and stir the rice until the wine is absorbed (this will happen pretty quickly).

Begin adding the warm broth to the rice, one ladle at a time.  Stir frequently, and as soon as the rice starts to stick, add another ladle of broth.  Continue this process until the rice is cooked al dente.  (Probably between 15 and 25 minutes).

Add the mushrooms to the rice and mix well to incorporate.  If you have any vegan parmesan on hand, add some of that too.  Serve warm with a salad for a hearty and delicious dinner.

Note: You could substitute lots of other veggies for the mushrooms.  Try asparagus! Gently steam it until just done, and add it back to the risotto at the end.

A Vegan-Friendly Birthday party

About six weeks ago, I was about four weeks away from turning thirty.  My mom floated the idea of having a party for me; in addition to her desire to celebrate the big 3-0 birthday, she was keen to host a party in her new home.  Despite feeling like my wedding was so recent that it was a bit ridiculous to have another event with my name on the header, I liked the idea of getting my friends and family together in my home town of Halifax, Nova Scotia.  The first challenge was determining if we could actually get anyone to attend a December party that hadn’t been booked months in advance (we could); the second challenge was deciding what kind of food to serve.

My fun-loving and close-knit family has all sorts of diets: lots of traditional omni, some gluten-free, some working-toward-vegetarian, and me.  With a guest list of about 35 people and several family members offering to bring dishes, we felt that an all-vegan menu might not be the best approach.  Ultimately, we ended up with a mostly-vegan spread, accompanied by a small number of dishes that included fish or dairy.  My thinking was that this way, I could demonstrate that the delicious vegan stuff holds its own alongside the traditional food, and maybe help a few people take some baby steps toward interest in a vegan diet without making them feel forced.

My mom did a wonderful job planning the menu, sourcing dishes from a variety of caterers, and choosing a few to prepare at home.  I flew home the day before the party and the house was already decorated, the bar set up, and the dining room table covered with all the good servingware, all shined up.

EnVie is Halifax’s newest vegan restaurant.  Their artichoke and spinach dip was a huge hit at the party, and a great example of an I-can’t-believe-it’s-vegan dish.  (We had some leftover and I pretty much lived off of it for the next couple of days.)  They also made me a beautiful and really delicious birthday cake that got rave reviews from everyone who tried it.

Tarek’s Cafe is a vegetarian/vegan-friendly and constantly bustling Middle Eastern restaurant that I always make a point of visiting when I’m in Halifax.  The falafels we got from them were huge and greasily decadent; cut into quarters and served with Tarek’s tahini sauce, they didn’t last long on the table.

Halifax catering stalwart Scanway provided cold salad rolls with mint dipping sauce (superb presentation, and delicious – we only wished we’d ordered more of them!), tasty mushroom phyllo pockets, and tofu kebabs that were rather petite but very yummy.  The standout from Scanway was the huge tray of vegan chocolate cupcakes.  The icing was so thick you could have sculpted with it, and the edible glitter made them sparkle so prettily… they tasted as good as they looked.

The vegan offerings also included homemade hummus and guacamole, and a tray of beautiful canapés I whipped up featuring pomegranate seeds and garlicky baba ganoush on cucumber slices.  We rounded out the vegan menu with lots of tortilla chips, pita, olives, nuts, and fruit.

The party was fantastic.  The food was delicious.  A good time was had by all.  I really felt the love from my family friends on my birthday, and I’m excited about starting my thirties.

Have you hosted any vegan or mostly-vegan parties for an omni crowd?  How did it go?

Vegan Poutine!

Image

Have you made vegan poutine yet?  If not, you better get to it ASAP.

I am actually new to the poutine scene.  I hated gravy growing up, and it wasn’t until I was an adult (and eating a vegan diet) that I was open-minded enough to give it another chance.  So, my first poutine ever was about six months ago at Poutini’s (they make a vegan one!).  It was amazing!  What was I thinking all that time with all the gravy-hate?  As an aside, I’m not usually a fan of Daiya cheese, but I find that in dishes that are very hot and ensure that the Daiya is melted and well-incorporated (like when it’s covered with gravy!) it actually works well and provides quite a cheesy experience.

For this very quick dinner I used frozen shoestring/julienne french fries, cooked until crisp, cheddar-style Daiya (though R informs me that mozza-style would have been more appropriate for poutine; I’m still learning!), and this vegan gravy that is made of pantry staples and easy to prepare.

I paired this bowl of melty yumminess with a kale salad to round out dinner, but the nice thing about the vegan poutine is that it’s not all that unhealthy, having shed the traditional saturated/animal fats.

So… what are you waiting for??

Baked Panko-Beer Onion Rings

Image

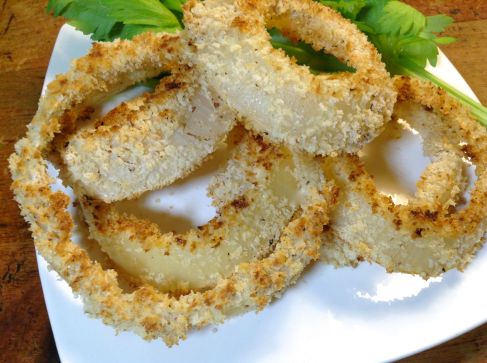
Onion rings! So delicious, but depending on how they’re prepared, they may also be so greasy, unhealthy, and regret-inducing.  These crispy rings are the perfect solution: oil-free, baked, and with a light coating that gives a great crunch while allowing the sweet, delicious onion flavour to shine through.  And despite the various bowls and possible minor mess involved, they are actually pretty quick to prepare.

When I was a kid, I hated onions.  The first time I encountered onion rings was at Harvey’s when I was around ten, and they smelled so good.  My ingenious solution to this yummy-smelling but oniony dilemma was to break each ring in half, pull out the tiny string of onion and cast it aside, and eat just the batter shell.  Wow, eh?  I’ve come a long way since then.

These rings would make a great appetizer or side for a veggie burger, or you can just eat a whole bunch of them for dinner (like I did).  You’ll feel great; no pangs of regret!

  • 2 Tablespoons ground flax
  • 5 Tablespoons warm water
  • 1/3 cup beer (or nondairy milk of choice)
  • ½ cup flour
  • ½ teaspoon salt
  • freshly ground pepper
  • 2 cups panko
  • ½ teaspoon garlic powder
  • ½ teaspoon paprika
  • 1 large Vidalia/sweet onion (about the size of a baseball)

Preheat oven to 450 and cover two baking sheets with parchment paper.

Combine the ground flax and water and stir well, then let it sit for a few minutes to gel (this is about 2 flax eggs).

Combine the flour, salt and pepper, and place in a shallow bowl.   Combine the panko, garlic powder and paprika and place in another shallow bowl. Once the flax eggs have gelled, add the beer (or milk) and stir, and place in yet another shallow bowl.

Set up the assembly line: flour bowl, flax/beer bowl, panko bowl, baking sheets.

Now you can cut your onion crosswise into very thick slices – mine were about an inch thick.  Pop the rings apart.

(I suggest cutting the onion after getting everything else is ready to minimize onion-related eyeball suffering.  You might want to light a couple of tealights or other unscented candles on the counter to help burn off the onion fumes.  You can also cover the cut onion with a towel to contain the fumes and just reach under to grab rings as you go.)

Make the rings: dredge a ring in flour, dip in flax/beer mixture, then dredge in panko.  Place on baking sheet.  Repeat with remaining onion rings.  To save space on the sheets, you can place teeny little nubby rings inside big ones.

Bake for about 20-24 minutes, turning the rings over gently about halfway through.  They should be browned along the edges and soft on the inside.

Serve with leafy celery sticks and dip of choice!  I suggest ketchup, hot sauce, or fancy mustard.  Mega yum.

Image

Carrot Sweet Potato Soup with Ginger & Coconut

Image

Am I overdoing it on the soups?  Is that possible?

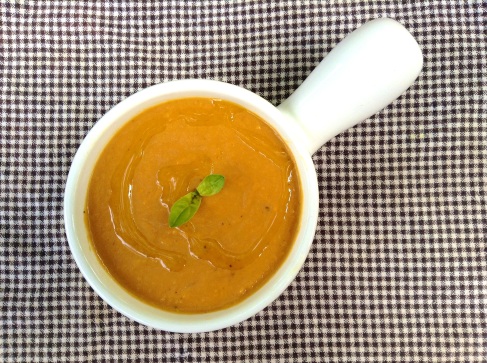
This soup is both aesthetically and gastronomically pleasing… looking as beautiful in the bowl as it tastes in your mouth!  An undercurrent of rich coconut adds depth to the delicious combination of carrot, sweet potato, and ginger.

After making a huge pot of veggie broth yesterday, I realized that my freezer is a little too full to accommodate a bunch of cup-sized frozen broth cubes.  As I was mulling over the broth-y possibilities, R. pulled out the giant bags of carrots and sweet potatoes we bought on a rare trip to Costco, and pointed out the half-bar of creamed coconut that’s been waiting forlornly for a purpose for an indefinite period of time.  He asked if I could make these things into a soup.  Yes, yes I could.

(Note: I wanted a very subtle coconut flavour to complement the ginger, so I used only a quarter-bar of creamed coconut.  If you really like coconut though, I think you could add up to half a bar for a stronger coconut flavour.)

Yield: Lots…. probably a good 8 servings.  (Or, dinner + seconds + leftovers to freeze!)

  • 5 very large carrots, peeled and cut into large chunks
  • Olive oil
  • 2 yellow onions, finely chopped
  • Cooking oil (I use canola)
  • 2 ribs celery, chopped
  • 2 inches of ginger, minced
  • 2 smallish sweet potatoes, peeled and diced
  • 4 cups vegetable broth (more or less)
  • ¼ bar of creamed coconut (the full bar is 170g), roughly chopped
  • ¾ cup milk of choice (I used soy)
  • Fresh ground black pepper

Heat the oven to 400.  Toss the carrots in olive oil and spread onto a baking sheet, then roast until softened through, about 30 minutes.

Meanwhile, heat some cooking oil over medium in a large stockpot.  Add the onion, celery, and ginger and cook, stirring occasionally, for about 10 minutes until softened.  Add about 3 cups of broth and the diced potatoes and turn heat to high.  Bring to a boil, then reduce heat and simmer until potatoes are soft.  At some point during the simmer, the carrots will probably be done and can be added to the soup.

Once the potatoes are very soft, turn off the heat.  Stir in the milk and the creamed coconut and let the soup cool until it’s no longer hot enough to burn you if it splatters during pureeing.

Add fresh ground black pepper.  Using an immersion blender (or a food processor, but you’ll have to do it in batches), puree the soup.  Add more broth to reach your preferred consistency.  I tasted the soup before adding salt and discovered it was perfect, so I didn’t end up adding any at all!

Garnish with a drizzle of olive oil to serve.